Easily add your personal schedule to your calendar with TimeEdit
Would you like to always have the most recent personal schedule with you without having to go to My admin or Toledo? You can now have your personal course schedule automatically synced with your own Google, Outlook or iCloud calendar.
Some important points to note:
- The exams included in your individual exam schedule can only be accessed via the tile My Individual Exam Schedule (IER) in My Admin, these do not appear in the synchronised calendar. Do you have more questions about exams? On the page exams you'll find answers to the most frequently asked questions about exams.
- Lessons that have passed will automatically disappear from your synchronised calendar after two weeks. You can still find them in your course schedule via My Admin.
- You have to repeat this synchronisation every academic year.
- The external application Quivr loads all courses only once but does not include any adjustments afterwards so it does not show the correct schedule. The Planning Department does not recommend using this app to consult your personal course schedule. All courses are also in the Education offer.
Follow the steps below to sync your individual course schedule to your own calendar:
Log in to TimeEdit and adjust the date
Go to https://www.timeedit.net
- Search for "Association KU Leuven" and click continue. Choose "Sign in Using SAML2 authentication". Log in with your KU Loket-login (R-number).
- Open your personal schedule
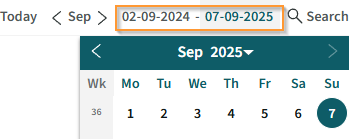
- Adjust the date at the top to the period you want to sync to your calendar.
- You do this by clicking on the info at the top (current week/ + 4 weeks)
- Choose the start and end date in the calendar.
- Click on "Subscribe" (1) in the upper right corner.
- Adjust the field time to the period you have set to synchronise (2).
- Now copy the URL that appears (3).

Add the class schedule in your own calendar
Depending on which calendar you use yourself, add the schedule in a different way:
- Google Calendar:
- select Add '+' next to Other Calendars > Via URL > Paste TimeEdit's URL here and click 'Add Calendar'.
- More info.
- Outlook Calendar:
- Go to the web version of Outlook on your laptop or tablet.
- Click 'Add Calendar' ('Add Calendar') > 'Subscribe from the web' ('Subscribe from web')
- Enter the copied web URL and ggive the calendar a name.
- Select "add to my calendars" (important!).
- Select at the bottom import and reboot all your Outlook applications.
- In the Outlook calendar on your PC, you can now check the calendar.
- In the Outlook app on your smartphone click on calendar. In the calendar, click on the calendar icon on the top left. Here you can activate or remove the added calendar by checking the box.
- More info
- iCloud Calendar:
- Click 'New Calendar' > 'Subscribe to an external, read-only calendar'
- Paste the TimeEdit URL and click 'Subscribe'.
- More info.